
 Who doesn’t love warm, fresh challah?
But who has time to make it from scratch?
In the earlier days of TC Jewfolk, we’ve shared a terrific from-scratch challah recipe. And those are, of course, the best. This post is for the rest of us.
We all know what a normal challah recipe starts with, right?
Mix flour, water, yeast…. let the yeast bubble… feed it some sugar (but not too much)… it’s halfway to keeping a pet! And who has time for the whole “double rise” thing?


So this is a way to get terrific, fresh, warm challah right out of your oven, without ever setting eyes on a bag of flour or a packet of yeast!
Intrigued? Well, here goes!
As much as I love to bake, I discovered this “shortcut” (read: cheat) when I was in high school, and in charge of making the family Rosh Hashana challah after class and before dinner — not exactly time for the whole 2-cycle rise routine.
So if, like me, you’re pressed for time and itching for fresh challah, then here we go…
Step 1: Buy any frozen sweet bread dough that strikes your fancy.
This is the stuff in the frozen section of the grocery store. There are always multiple brands of frozen bread dough. The ones labelled “sweet dough” are the best, although technically, any bread dough should do fine (this recipe is nothing if not flexible!) If you want to be really fancy about it, check to make sure that the list of ingredients includes eggs.
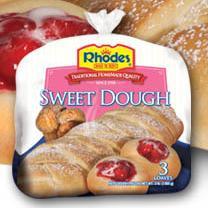 My local Rainbow Foods carries Rhodes Sweet Dough, which I like a lot, but any brand you like will do just fine.
(Incidentally, the Rhodes brand sweet dough is OU parve kosher. Type in “Rhodes” in the OU Kosher Product Search for details.)
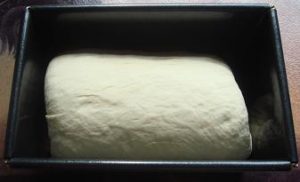
Step 2: Defrost the dough for a day in the fridge
In the morning, before you head out of the house, follow the instructions on your particular frozen dough package to defrost the dough in the fridge. This should take about 8 hours — or most of your day, anyway.
Note: for most frozen doughs, it is recommended to cover it with plastic wrap while defrosting, to prevent the dough drying out. Having a fridge with no weird smells in it helps, too.
At the end of the day, your dough should look vaguely like this:


Step 3: The Crucial Step! Turn your dough into Challah!
This is the crucial step! This is the one that turns your random, “bake your own bread” dough into real, honest-to-goodness challah. So pay attention now!
(For the intrepid, a swig of cooking wine may be recommended here. Apply internally. Please drink responsibly.)
When you get home in the afternoon, pull out your bread dough (see picture above).
Take each section of dough (most packages have either 2 or 3 separate dough pieces, and they’re easier to work with separately), and lay it out on a large cutting board (or a table, assuming it’s clean). Again, if you want to be really fancy, you could put some oil or some flour on the cutting board or table, to prevent sticking. Or not.
With your hands (I know, right?) flatten and stretch out the dough until it’s kind of flat — about half its previous height — and looks like a much larger piece. It’s a bit as if you’re unrolling it or pulling it out into a pizza-crust type look. It should end up about about an inch to inch-and-a-half thick.
This is where the fun begins.
Step 3.5: The Crucial Step! Turn your dough into Challah! – Part 2
Smear this newly-flattened, larger and flatter piece of dough with the following:
- Some beaten egg (beat with fork or whisk; baseball bat not recommended)
- Some softened butter – or oil, if you’re keeping the challah parve
- Some white sugar
- Some brown sugar
- Some honey
- Anything else you feel like having in your challah, really — raisins or cinnamon work nicely
(Note: the last few sweet ingredients are good if you’re making a sweet, Rosh Hashanah-type challah. You can leave them out for a more regular, every day, unsweetened challah. Although at least a little honey is usually nice.)
Now comes the really fun, bring-out-the-kid-in-you part….
Step 4: Knead it all in!
Again with your hands, take this dough now covered with lots of “stuff” (see the technical terms I’m using here?), and knead and fold and “massage” the dough, until most of the ingredients you’ve smeared over the dough are kind of worked into the main mass.
It will be slippery, so watch out! It will also turn your table/cutting board/walls/self/kids/dog into a royal mess, but that’s just the price we all have to pay for warm, doughy perfection.
Step 5: Repeat steps 3-4 with all the remaining dough pieces.
This should be self-explanatory. If confused, check your cooking wine intake, and try again when sober.
Step 6: Shape your Challah
By this point, you should be covered with some combination of eggs, butter, honey, and sugar, so you might as well cut your losses, and go all in!
You should have 2-3 pieces of dough, generously smeared with all the aforementioned yummy, gooey stuff.
So let’s shape them into challah!
(For the sake of this column, I am assuming a normal, every day, braided challah. For a Rosh Hashanah challah, use more sugar & honey, and simply pull the dough pieces into long-ish ropes, and twist them into a spiral. Not too complicated — compared to the braid, anyway.)
So — if you want to go the easy way (and that’s what this is all about, right?), make sure you have 3 equal sections of dough. (If you started with 2 – cut a third off each one, and combine the cut off pieces to make a 3rd piece. Or buy 3 pieces next time.)
Step 6.5: Braiding Instructions

Lay down the 3 sections side by side, about 1 inch apart.
Pinch the tops of the 3 strands together, and tuck under the rest.
Starting at the top, directly below the pinched dough, cross the right-most section over the middle section.
Now cross the left-most section over the new-middle (formerly right) section.
Continue crossing over from right, then left, in succession.
Repeat until you run out of dough.
Pinch the last few remaining bits at the bottom together, and tuck under.
You should now have a completed challah braid. It will look roughly like this:

Braiding Help:
For those in need of extra help, call your nearest long-haired friend or relative (or the exasperated parent of one).
Or see this excellent step-by-step challah braiding guide (with pictures) here.
For a terrific general article on braiding, including 3-strand and 4-strand braid techniques, with detailed instructions and diagrams, see How to Upbraid Your Friends. (Incredibly, the same techniques work for your daughter’s hair and your challah!)
Note: (For advanced students only) The first few times you do this, you are likely to end up with a much thicker top of the braid than the bottom. This is fine, and will not affect the taste of your challah one bit. However, if you want your challah to look all nice and perfect (my, aren’t we getting fancy?), start braiding from the middle of the sections of dough to the bottom. Then rotate the challah all the way around, and braid back from the middle to the top, placing the side strands under the middle for the second half. This will keep your challah looking nice and even, with a thick center, and thinner ends.
For really advanced students, here’s a neat video explaining how to braid a 4-strand challah:
Step 7: Bake the Challah (FINALLY!)
Let the braided challah sit for about 15-20 min. Meanwhile…
Pre-heat your oven to the temperature indicated on your frozen dough package (usually 350F).
Get a cookie sheet or pizza stone (or any flat piece of stone or sheet metal, really).
Lay out some parchment paper or aluminum foil on the sheet (this is merely to make for easier clean up, and is technically optional). For even easier clean up, spray the paper or foil with cooking spray, or rub with a little oil or butter.
Place your challah braid on the covered & oiled baking sheet. (Note: to make life even easier, you can braid the challah on the cooking sheet directly, and let it rest right there.)
If you want to get extra fancy, you can:
- Brush the top of your challah with some beaten egg
- Or some honey
- And/or sprinkle with sesame seeds/poppy seeds/cinnamon
Bake per the instructions on your frozen dough package (Usually roughly 20-25 minutes). If it’s too big (ie, you used a ton of dough) — it may take longer to bake through. The challah will be a lovely golden brown when ready.
Final Steps:
Take out of oven.
Turn off oven.
Brag loudly to all your friends how you slaved in the kitchen for days to make challah from scratch! This is especially useful for impressing potential dates and future mothers in law. (Dates not guaranteed. Your mileage may vary.)
Enjoy!
[Images: Wikimedia, rhodesbread, Wikimedia, Wikimedia, Bowery]


Thank you I love this
You made me laugh and this is fantastic tips on making homemade challah
Esther
Your hilarious and this is brilliant!
Can you share the measurements that you use lchvod Shabbos.I’m so the type that is going to botch up by ballparking it( And this is without using my boys bats:)
Thanks!